Tasks
A task is an item of work that needs to be completed by someone in your company. Tasks are assigned to individuals, or teams of people, to complete. Tasks can also be linked together.
Tasks allow you to plan future work, track ongoing work, or review work items that are on hold, completed, or have been aborted. It is the "source of truth" for what work needs to be completed by each person, while also providing management with a complete overview of work across an organisation.
Tasks can be created by people in your organisation, or created by Rapid Platform itself. Later in this workshop, we will examine how the HR module in Rapid Business generates tasks automatically for users to complete.
Accessing the Tasks List
When you log into Rapid Business, you can access the Tasks module by using the Tasks menu item on the left-hand sidebar. By default, the icon is a clipboard with a checkmark.

Here, we have different pages that allow you to add and track your new tasks. You can also view a visual report of all tasks.
If we click on the Task Portal option, we will be taken to a page where we can view the Task Board. This is a Kanban-style board where the user can see their current tasks by default.
In the previous training workshop, we learned about views. Notice that the tasks board also is filtered using a view that only displays My Tasks. This view only shows tasks assigned to the current user or the user's group, and does not display any tasks that are completed or aborted.
We can change the view to see tasks assigned to others, or to see the Main view, which will display all tasks in the site.
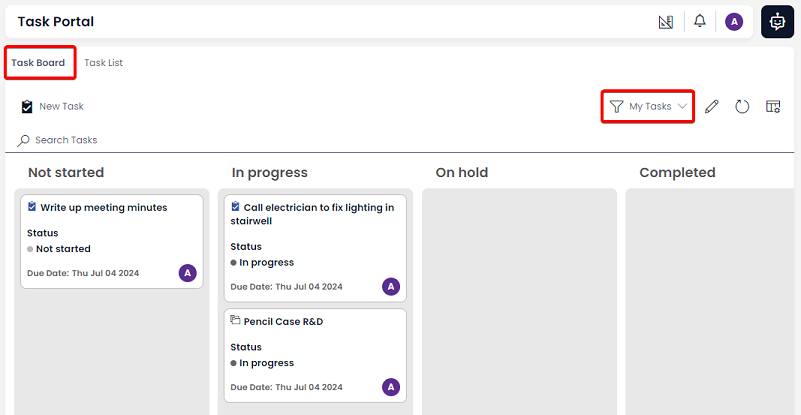
Here, each of the cards on the board represents a task item. We can click and drag a task to move it to another status category. For example, we can drag the task "Write up meeting minutes" so that it is now In Progress. We would then need to save.
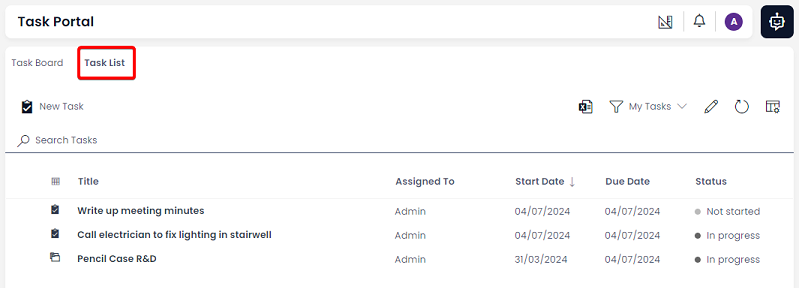
We change our page by going to the tabs section at the top of the site and switching to the "Task List". Now we can see the same items but in the familiar table format.
Creating a New Task
We can create tasks just like any other item in Rapid. In the Command Bar, press the New Task button. The "New Task" create screen will open, where we can enter the details of the work item we want to create:
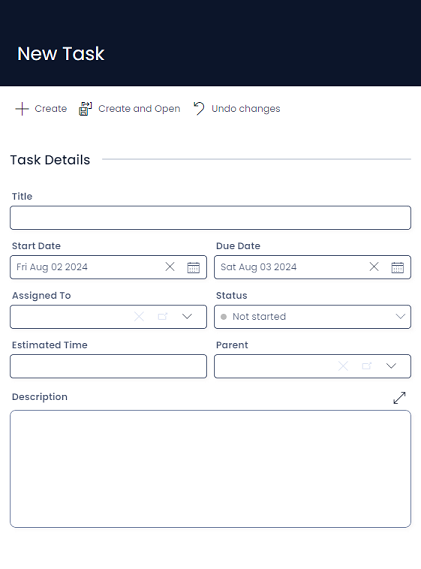
We can type a Title that briefly describes what work needs to be accomplished, and use the Description field to provide more details. We can Assign the task to an individual user, or a group of users. For example, a WHS complaint could be Assigned To a WHS officer, or it could be assigned to the WHS Team, and then all members of that team will be able to see the task appear in their tasks list.
The Parent field is used to link a task to another item. The task will then appear in the Tasks tab of that item. We can even have tasks that are parents of other tasks. For example:
| Parent | Child |
|---|---|
| Conduct a sales meeting with client. | Schedule a time to meet with client. |
| Write up minutes from the meeting. |
In the example above, the task Conduct a sales meeting with client* is the parent of the other two tasks. By completing the child tasks, it will mean the parent task is complete as well.
By structuring tasks as parents with children, we can create data trees and render them as Gantt Charts, for example.

Editing a Task
We can edit tasks and the data they contain, just like a regular item in Rapid.
The default task details page contains:
- Fields that can be edited (just like the Employee item that we looked at in Part 2).
- Tasks also contain a forms section where forms can be embedded. These forms allow additional items to be created or edited from within the task item.
- The task timeline is by default also visible on the main details page, on the rightmost portion of the page.
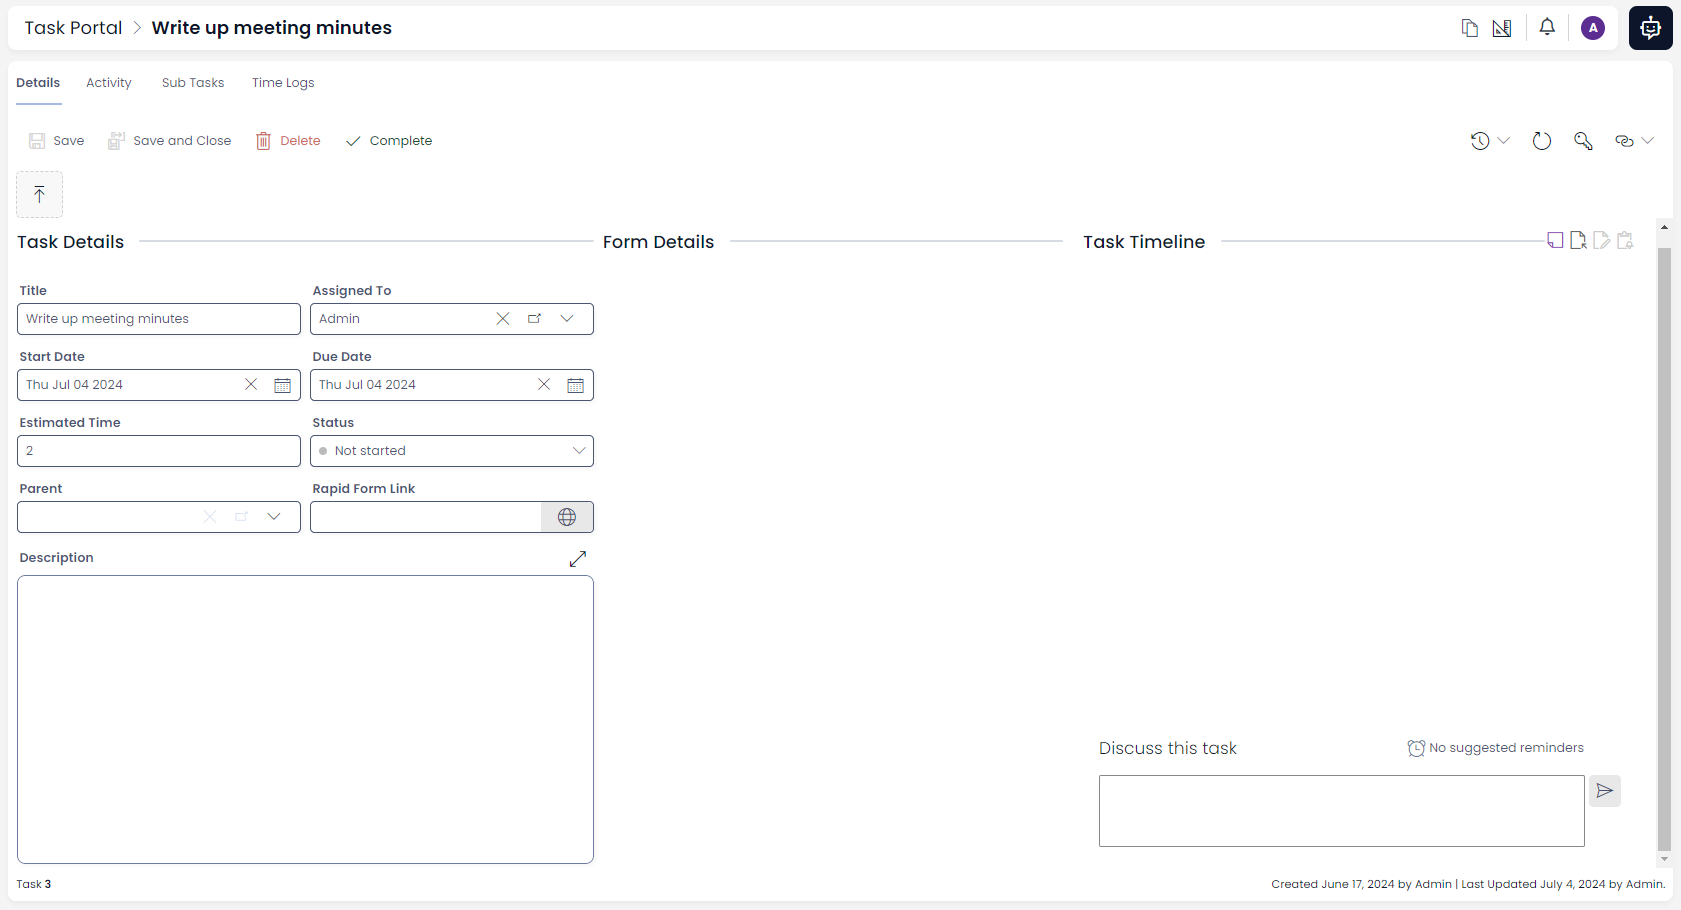
After making changes, ensure you press the Save or Save and Close buttons in the Command Bar.
Further Reading
- You can read more thorough documentation about tasks in the User Manual